disney crossover Club
Join
Fanpop
New Post
Explore Fanpop
Crossovers can be complicated, there's no doubt about it, and one of the most nit-picky of them all is the kiss picture. Depicting intimacy between two characters is very hard, especially if they are different styles or color schemes. So, with prompting from DA, I decided to make a tutorial on how I create my rare kissing photos. I've only made around four my entire (gasp! three month long xD) time manipulating, and today I'm going to remake the first one i ever did.

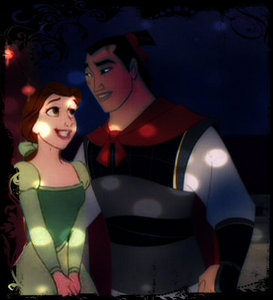
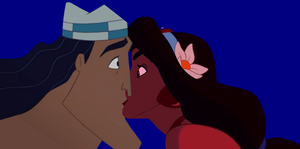
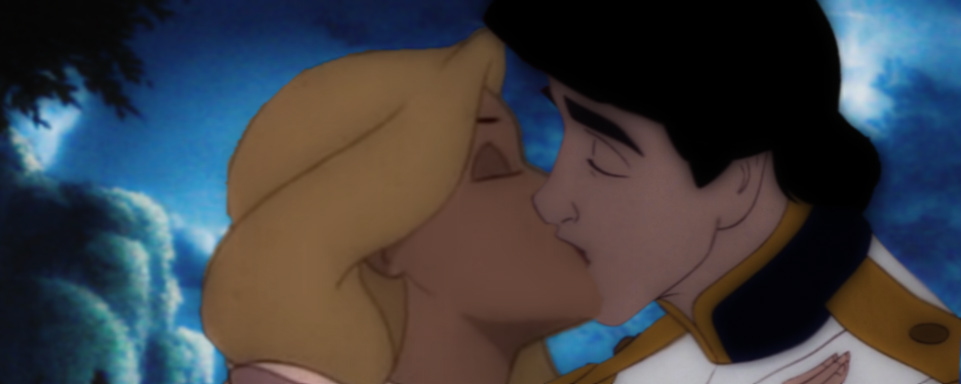
This tutorial will be using Eric and Odette, two characters who having kissing scenes in their movies. I'll have a follow up article after this on how to do these manips for characters who do not kiss in their respective movies.

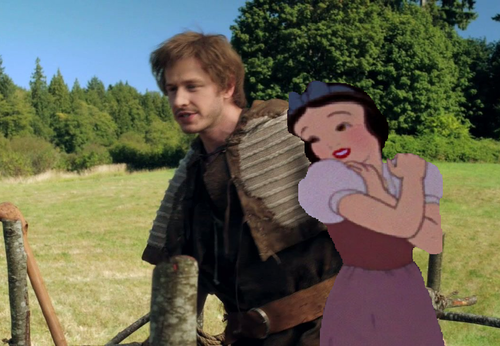
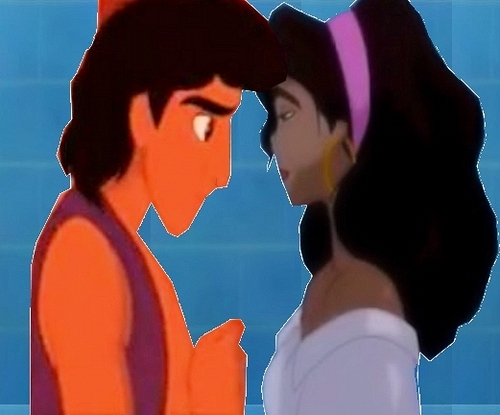
I have three main editing sites I work with, and for this picture I'll be using Fotoflexer first, and Pixlr second. Let's go a bit backwards, the final manip is above.
Here's the beginning of Fotoflexer, just click upload
Now upload the two photos you'll be using.
Here's Eric and Ariel, cropped.
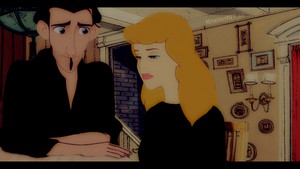
Here we have Derek and Odette
Now it's time to start cropping the two characters. You can enlarge the first photo you plan on cropping, as I did with Eric. At the top, on the far right, you will see a tab labeled 'Geek'. Select this then, making sure you have clicked on Eric and Ariel
If you click on 'Smart Scissors', you should see this.
Start clicking and setting the points along your subject's head, a red outline will appear around the edges. You can click and drag the line if you wish to include something it left out.
Take care to keep in the lips and the chin. This manip will be made easier by the fact that Odette has the submissive lip and Eric has the dominant one. Once you have made the round, the part of the picture you will be deleting will turn much darker.
Click 'Create Cutout'
Now you have a rather odd looking, Ariel-less Eric. You can move on to the next subject of the kiss, which is Odette in this case.
After you click on the picture of Derek and Odette, go to the 'Layers' tab and click this. This button will bring them to the front so you can enlarge them and see them clearly.
Now just follow the same pattern as Eric, keeping in her lips and the place where Derek's nose is in front of her face.
Now you have the two of them, both with out a partner. You may notice, if you have eyes, that Eric is a giant, and Odette is facing the wrong way. But don't worry, this is an easy fix.
Click on Odette, go to 'Basics', and click 'Flip'. She will now be facing Eric. You can then toggle their sizes until you are satisfied.
Find this tab 'Decorate'. It's about to become your new best friend. Now meet your new fringe friends.
This is the 'Choose Color' button, to grab a color from the photo, you just click on the color you want.
And your final new friend, the 'Draw' button. This allows you to use the colors you grab to draw in body parts/lips/skin. you can toggle the brush size to your liking.
Fiddle around with these two a bit, size up their faces and chins most importantly. I can't really explain the total process without being with you as I do it, it's a lot of guesswork and experimentation.
But, Odette is a lot more red based than Eric. This can also be pretty easily solved. Go to the 'Effects' tab, which will show you this. Be sure to select Odette.
Find this button and choose a color that suits both. Because Eric is very gray, I choose a light gray. You can select 'Advanced Options' to fade how strong the tint is as well.
added by PrincessBelle2
Source: Disney ABC
posted by StarWarsFan7
As Shang and I are lying on the couch in the middle of the living room-library, we hear three knocks from the wooden door. Shang gets up to open the door.

"Shang!" An old-but-young woman hugs my fiance. It's Shang's mother.

"Hello Meiling!" I greet Meiling and she gives me half a smile and half a disgusted look.

"Mother, I am so happy you were able to make it!"

Ever since I had met Shang for the first time at the library and we began dating his mother was always there with us. Just to make sure we're not doing anything, erm, dirty. Of course a lady like me wouldn't do such a thing. When Shang...
continue reading...
posted by StarWarsFan7
After a 20 minute drive in Shang's Ford SUV, we arrive in his empty driveway. It's very eery and dark out. All you can see is the SUV's bright headlights. Shang opens his door and gets out of the vehicle. He opens the trunk and takes all of my luggage out. I unbuckle my seat belt and help him with my bags.

"Oh no, I don't need any help."

I roll my cocoa brown eyes. "Yes. You do."

I take a polka dotted maroon suitcase from my fiance's full arms.

He takes a deep, relieved breath. "Thank you."

"No problem." I give Shang a quick kiss on his left cheek right before I head for the door.

"Wait!" I hear...
continue reading...
added by CaterdayGirl
Source: I don't own the art I just put them together
added by Ahthen
Source: Me!
added by CaterdayGirl
Source: CaterdayGirl
added by pretty_angel92
Source: namelessdoll
added by ponyboyjohnny
Source: made by me
added by DIAMELA
Source: by me
I just decided to share on how I make my crossovers. This is also to help others who want to learn how to make crossovers. :)

Now making crossovers is a fun hobby, especially if you're pairing up your favorite characters.

So here's what you need to make a crossover:
1. Photo Editing Program - this is the main thing that you need in making crossovers. You can use any program you like. I use link It's an online editing website and you don't need to pay or register. Just get in there. xD
2. Your favored pictures. You can merge numerous characters in one picture, your choice.

Tip#1: Use picture with...
continue reading...
added by Naya518
added by alexpatterson
added by Angeelous
Source: angeelous
added by ajotma
added by rzenteno
Source: Disney Crossover
added by ajotma
added by alexpatterson