
Hello everybody! I thought I'd show you how I make simple club banners. I'm kind of a beginner at it, but hey, they get the job done. XP Here we go:
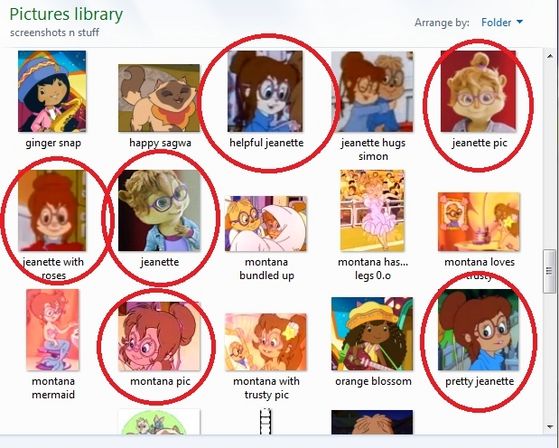
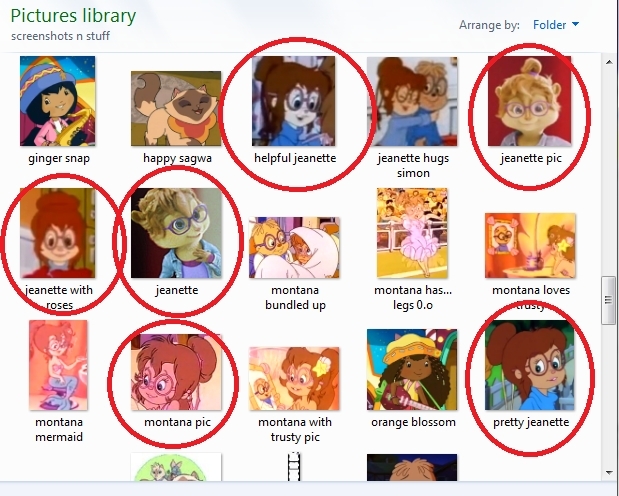
1. First, I gather a few images relating to the club- usually at least 6.
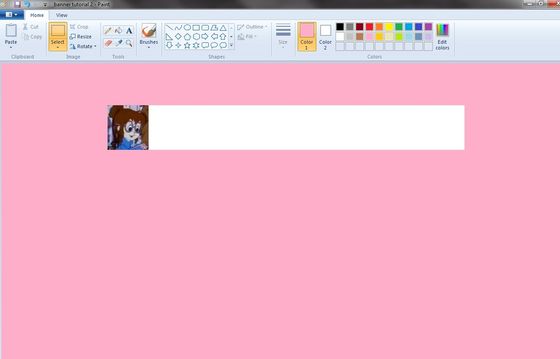
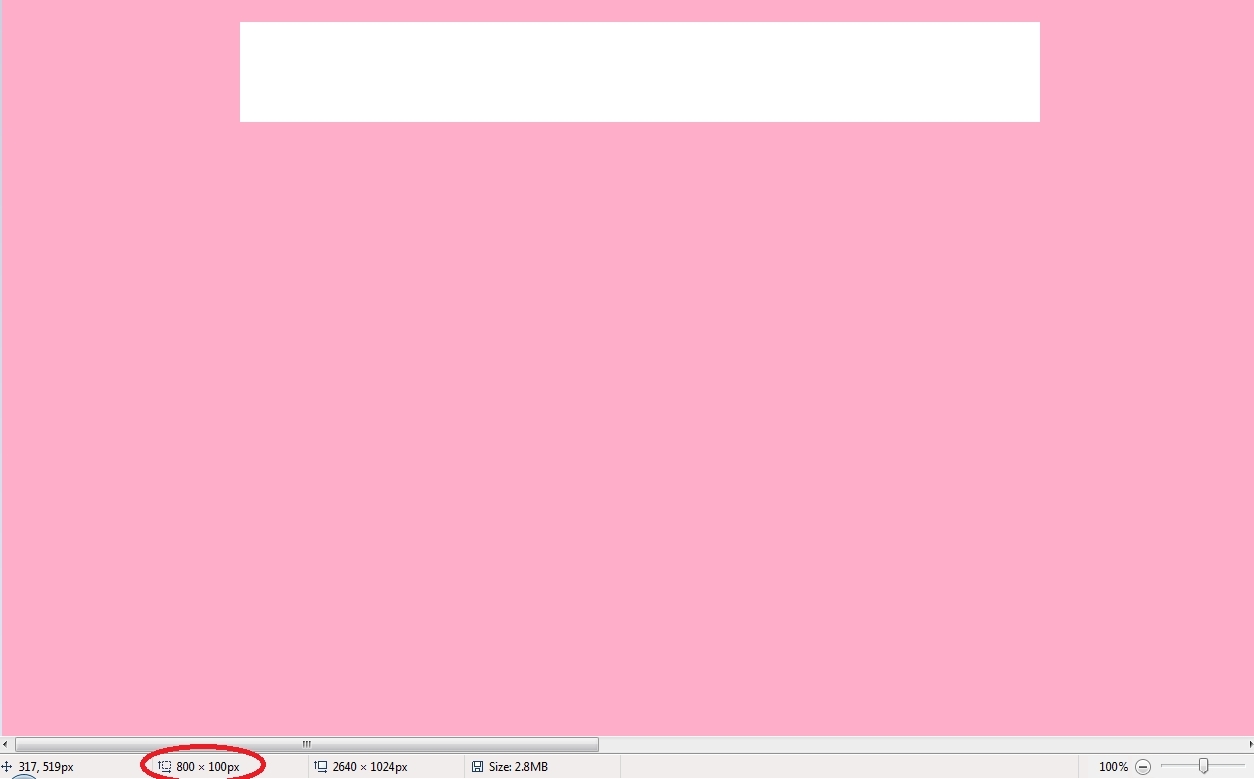
2. Then I open Paint and use "Fill with color" to paint the entire screen one color. I prefer light pink, as it hurts my eyes less than other colors.
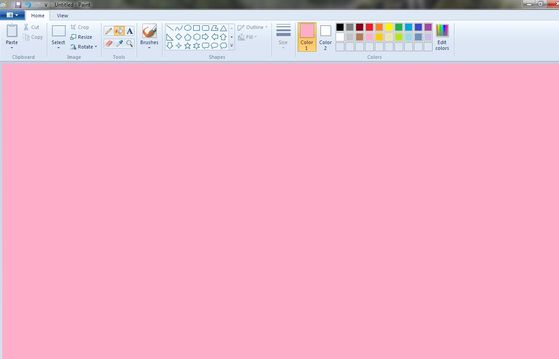
3. Next, I use "Select" to select a box that's 800x100 pixels. Then I click the tab under "Select", then choose "Delete." The white box remaining will be a guideline for the banner.

4. To put other pictures into Paint, I go to the tab under "Paste" and select "Paste from."

5. Now I can choose the first image.

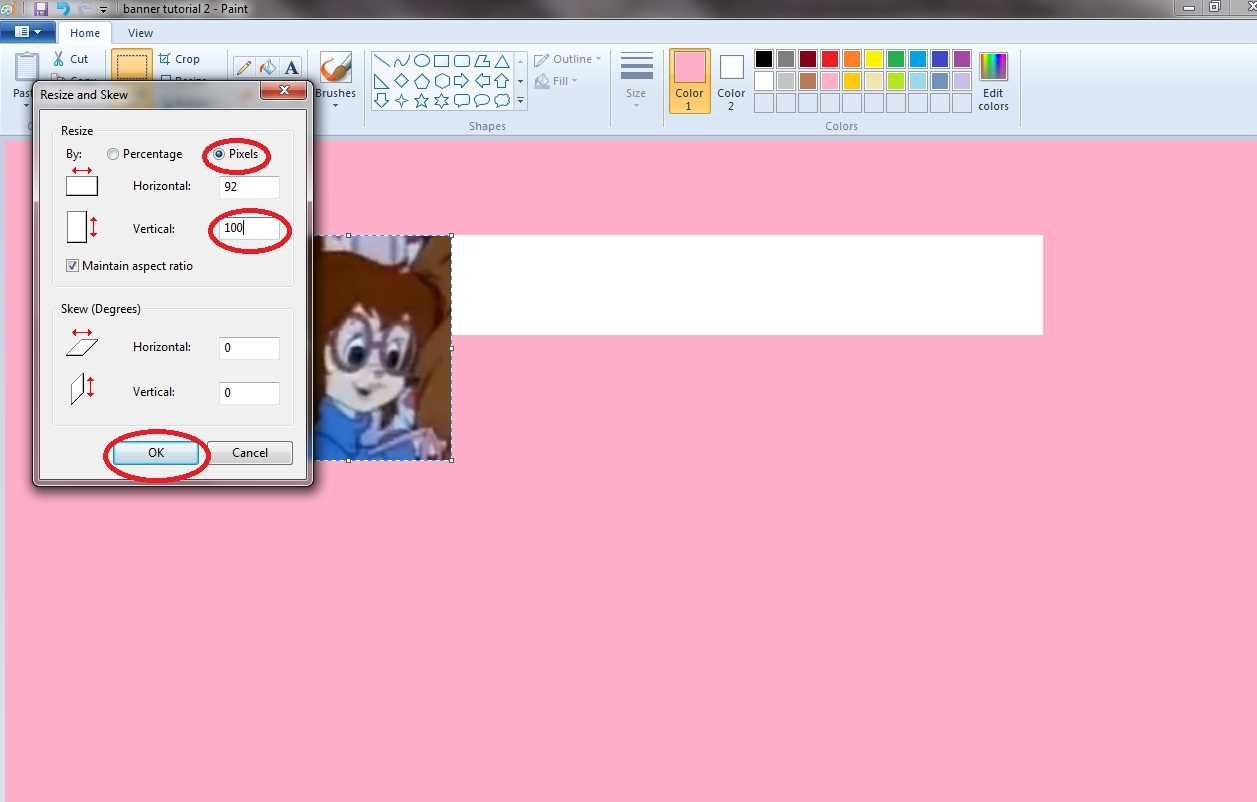
6. As you can see, the image is too big to fit in the banner. Not to worry- I can just click "Resize" to make it the right size.
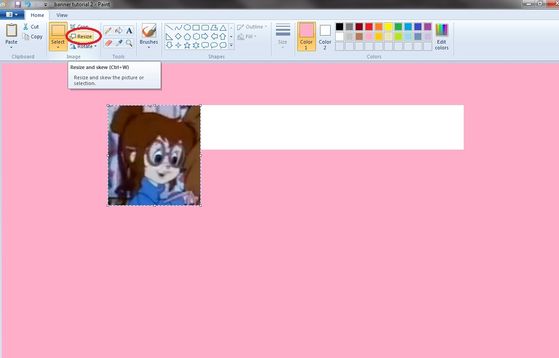
7. If an image is too big, I go to "Resize", then choose "Pixels." I set "Vertical" to 100 pixels so the image will be small enough to fit in the banner.

8. Then I align the picture so it's in the right place in the banner.
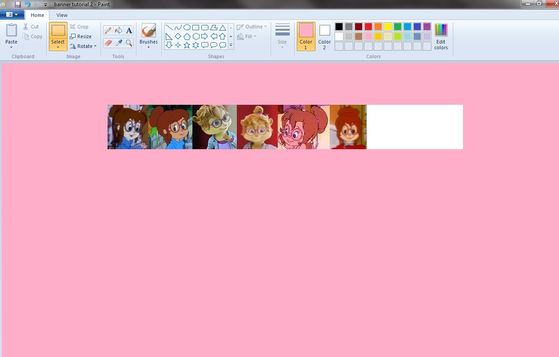
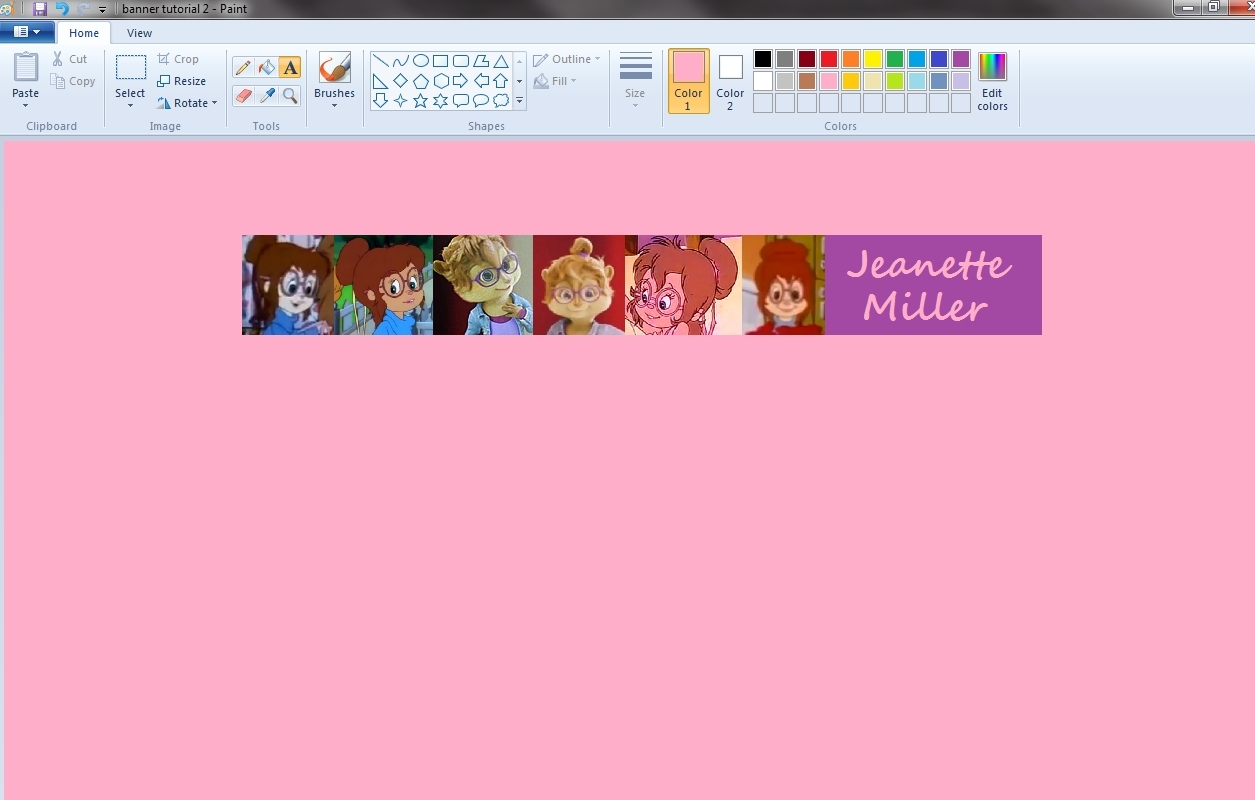
9. Then I repeat steps 4-8 until all the pictures I want are in the banner.
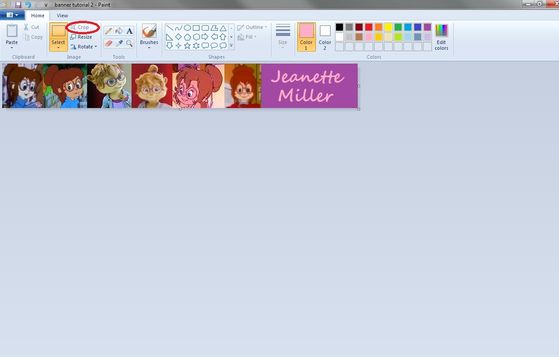
10. If the banner still has some room left over, like this one, I like to fill the empty space with one color and use "Text" to add something related to the club in another color. The Segoe fonts are my favorites, but you can use whatever font you like.

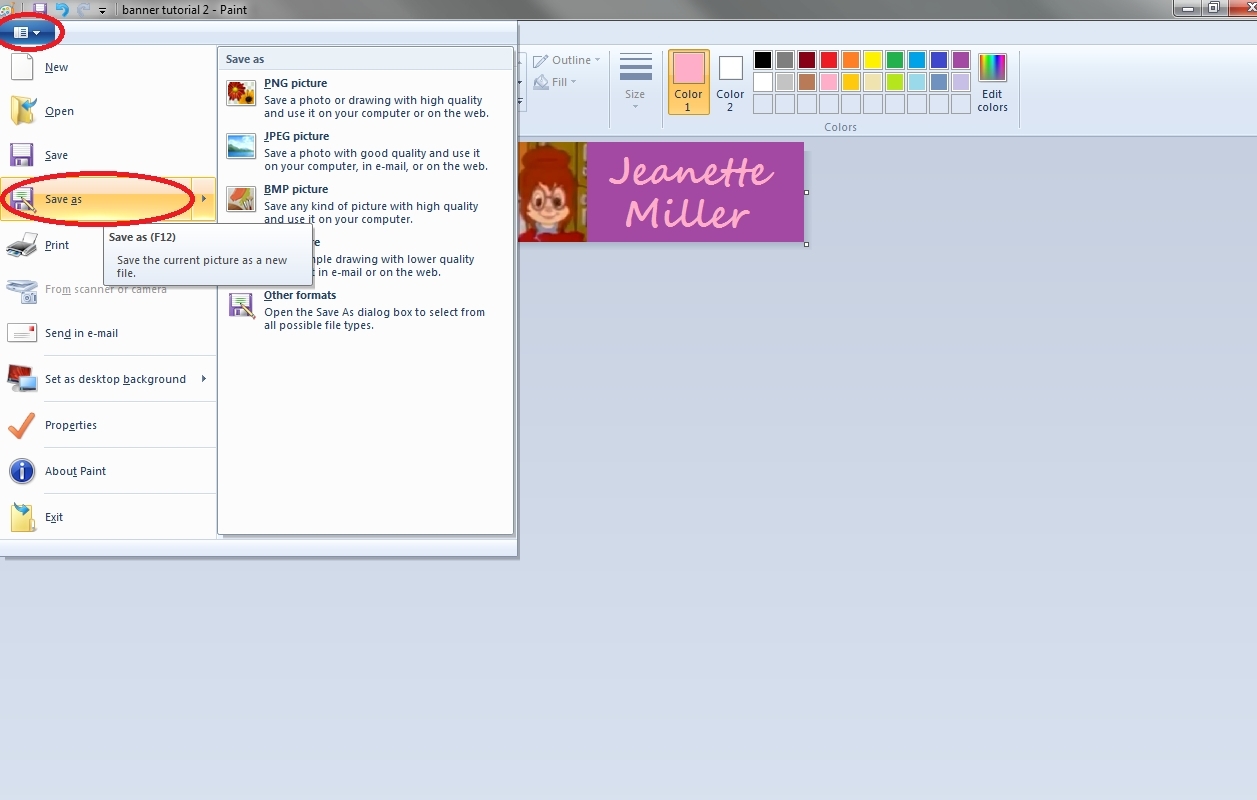
11. Then I use "Select" to draw a box around the banner, making sure it's 800x100 pixels, then click "Crop."
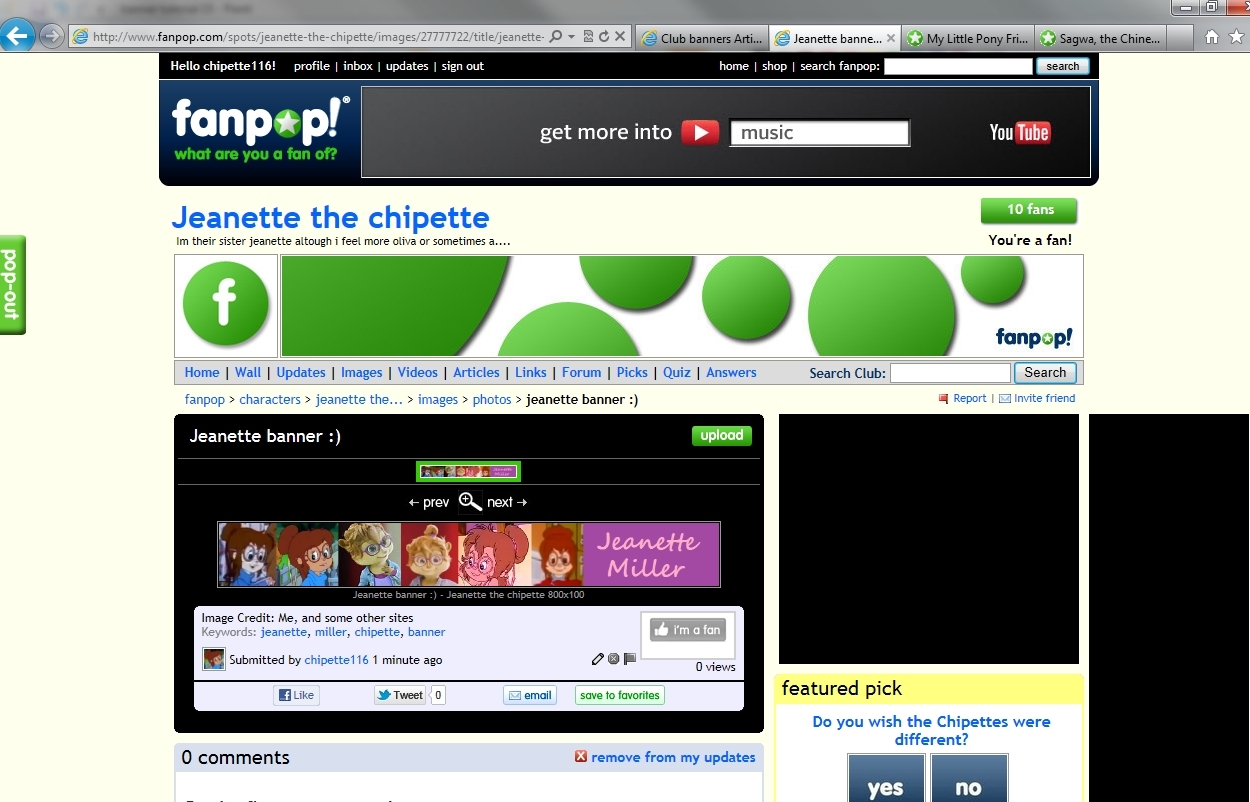
12. Now the banner is ready to save.

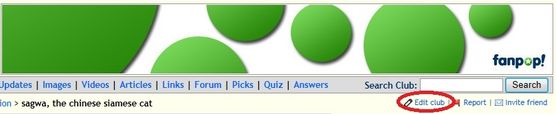
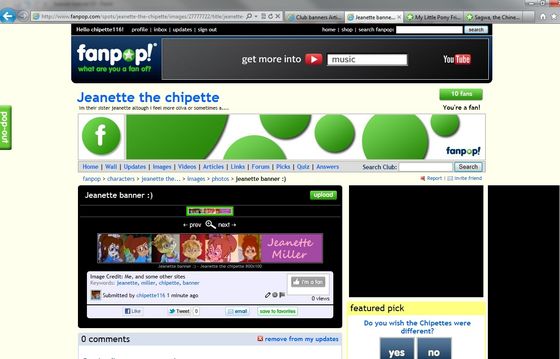
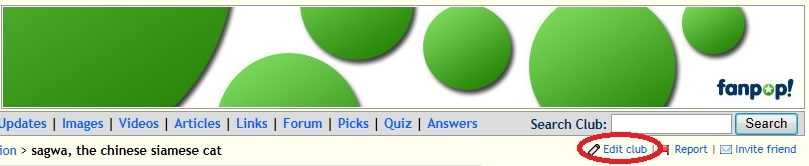
13. If the banner is for a club you created, then go to the club the banner is for, click "edit club", and upload your banner.
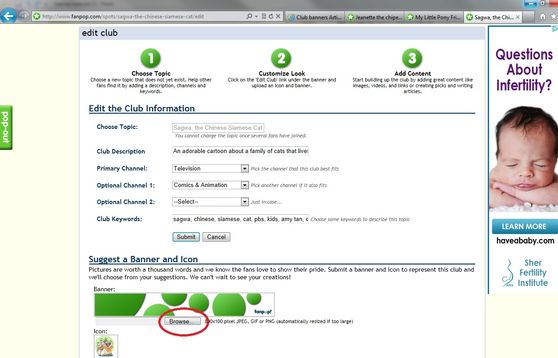
If you didn't create the club, you can upload the banner to the club as a suggestion.

And there you have it! A basic banner-making tutorial. ^u^
A few side notes:
Not all my banners turn out like this- sometimes there's only a tiny bit of room left, in which case I like to make a little bar on eack side and color the bars. Then I add some text over the pictures. An example:

Or sometimes the pictures take up too much space, in which case I have to use "Select" to grab parts of the banner and drag them around to cut off parts of some pictures and kinda squish them together more. XP Then when I crop it too 800x100 pixels, there might still be a really teeny-tiny bit of space left because I might have squished the pictures a little too much... I just fill that in. Those don't turn out as well as the others... >u< Like this one:

Or sometimes instead of text, I'll add a picture or two with words in it... I have to mess around with resizing a little more for those- keep trying different pixel sizes in both "Horizontal" and "Vertical" until it fits. XP Sometimes I even have to stretch the picture(to do that, uncheck the "Maintain aspect ratio" box). Like with this one:

Well, I better stop blabbering now... XD Have fun making your own banners! :)
1. First, I gather a few images relating to the club- usually at least 6.
2. Then I open Paint and use "Fill with color" to paint the entire screen one color. I prefer light pink, as it hurts my eyes less than other colors.

3. Next, I use "Select" to select a box that's 800x100 pixels. Then I click the tab under "Select", then choose "Delete." The white box remaining will be a guideline for the banner.
4. To put other pictures into Paint, I go to the tab under "Paste" and select "Paste from."

5. Now I can choose the first image.

6. As you can see, the image is too big to fit in the banner. Not to worry- I can just click "Resize" to make it the right size.

7. If an image is too big, I go to "Resize", then choose "Pixels." I set "Vertical" to 100 pixels so the image will be small enough to fit in the banner.
8. Then I align the picture so it's in the right place in the banner.

9. Then I repeat steps 4-8 until all the pictures I want are in the banner.

10. If the banner still has some room left over, like this one, I like to fill the empty space with one color and use "Text" to add something related to the club in another color. The Segoe fonts are my favorites, but you can use whatever font you like.
11. Then I use "Select" to draw a box around the banner, making sure it's 800x100 pixels, then click "Crop."

12. Now the banner is ready to save.
13. If the banner is for a club you created, then go to the club the banner is for, click "edit club", and upload your banner.

If you didn't create the club, you can upload the banner to the club as a suggestion.

And there you have it! A basic banner-making tutorial. ^u^
A few side notes:
Not all my banners turn out like this- sometimes there's only a tiny bit of room left, in which case I like to make a little bar on eack side and color the bars. Then I add some text over the pictures. An example:

Or sometimes the pictures take up too much space, in which case I have to use "Select" to grab parts of the banner and drag them around to cut off parts of some pictures and kinda squish them together more. XP Then when I crop it too 800x100 pixels, there might still be a really teeny-tiny bit of space left because I might have squished the pictures a little too much... I just fill that in. Those don't turn out as well as the others... >u< Like this one:

Or sometimes instead of text, I'll add a picture or two with words in it... I have to mess around with resizing a little more for those- keep trying different pixel sizes in both "Horizontal" and "Vertical" until it fits. XP Sometimes I even have to stretch the picture(to do that, uncheck the "Maintain aspect ratio" box). Like with this one:

Well, I better stop blabbering now... XD Have fun making your own banners! :)